
How to clean a Brother Project Runway sewing machine
One thing I LOVE about my Brother Project Runway (the Innov-is 40 model) is that it doesn’t really need servicing too often at all. Brother sewing machines are self-oiling, meaning, each part oils itself as you use it. But with the average cost of getting a computerized machine serviced heading upwards of $130 (in Nashville, anyway), knowing how to clean your machine can save you some serious cash (or at least help you feed your fabric fund :). As long as you aren’t pulling your spool of thread off without trimming the thread and pulling DOWN to remove it, there shouldn’t be much lint hanging out in the actual motor area of the machine.
I put together a quick how-to-clean-it for others with this machine. If you’ve been sewing on it for a while, and it’s not as quiet as it used to be, or you’re having feed dog problems, it’s time. Grab a small paint brush, the screwdriver your machine came with, and a paint bucket key (for removing paint bucket lids), and a fresh paper towel.
STEP 1: REMOVE THE NEEDLE + PRESSER FOOT + BOBBIN
This gets both out of the way so you have more space for spring cleaning up in there! Simply unscrew the needle as if you were changing it, and apply your screwdriver to the screw facing out to the left of your machine above the presser foot. This will release the entire mechanism, not just the foot itself.
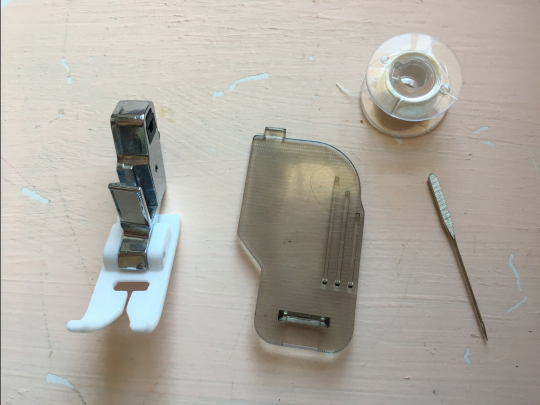
Remove the bobbin plate and take out the bobbin. This way you’ll be able to get to the bobbin casing and give it a proper dusting. No cleaning yet though!
STEP 2: REMOVE THE PLASTIC PLATE
Forgot to snap a picture.. oh well. This machine has two small screws that must be removed from the gray plastic piece that must come out first thing. Once you’ve removed the two screws, slide the gray plastic piece TOWARD you to release. You’ll notice a small indention toward the back of this plate indicating a slide point. Set it aside with the screws.
STEP 3: REMOVE THE NEEDLE PLATE

The needle plate is the magical metal plate that the presser foot rests on. To remove it, you’ll need either your screwdriver, or what I like to use- a paint bucket lid key. With where that screw is situated on my Brother Project Runway Innov-is 40, the screwdriver can’t settle into the screw in a totally upright position, leaving me stuck. One little baby turn using that paint bucket key and the screw comes right out, with little fight. Remove the other screw (on the right side) and pull the needle plate up to remove. Set the screws and needle plate aside but group them together so nothing gets lost.
STEP 3: REMOVE THE BOBBIN CASING
BEFORE you remove the casing, take note at how it’s situated inside the base of the machine. This will save you time and curse words later. The bobbin casing should pop right out with no difficulties.. Put it aside for cleaning. By now you should be able to see clear to the bottom of your machine, aside from the basic mechanisms that make the whole sewing thing happen.
STEP 4: SPRING CLEANING
Use a paintbrush to collect any dust or lint on the feed dogs + bobbin casing area. Do not use a cloth on any of these pieces or parts. DO NOT USE A CLOTH ON ANYTHING INSIDE YOUR MACHINE. A cloth will remove the oil Brother has used to keep your machine running smoothly and quietly. A brush won’t remove it. Reach inside as far as you can to the right and the back of this area to grab any dust/lint you see. Keep pulling the dust out bit by bit until it’s all purdy in there. Pay extra attention to the feed dogs: those toothy little plates that sit right beneath where your presser foot normally is. Lint tends to build up badly there- to the point where you may need tweezers to remove fibersif you’ve been a terrible sewing machine owner and haven’t kept it clean. Bonus points if you’re Type A therefore using your phone’s flashlight like I did.
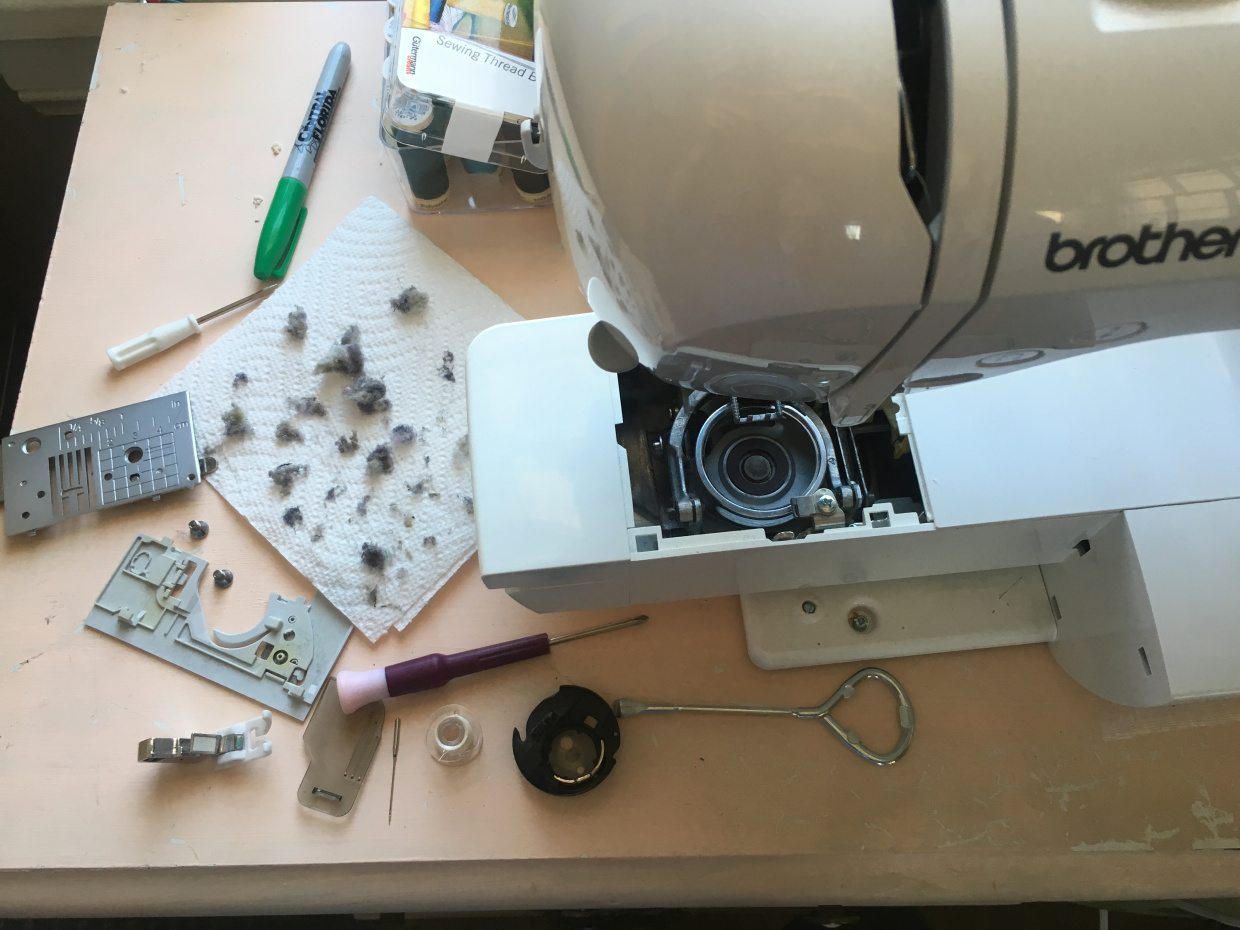
Yuck! This was after 3 weeks of sewing for me. Can you believe some people never clean their machines???
STEP 5: CLEAN EVERYTHING YOU REMOVED
Run your paintbrush over the plastic bobbin plate and the needle plate. Then clean the bobbin casing too. This ensures you’re not putting any lint back into your clean machine.
STEP 6: PUT EVERYTHING BACK IN REVERSE ORDER
- Start by settling the bobbin casing back in. Make sure it faces the same direction it did before you took it out, or you’re going to have i s s u e s .
- Reset the needle plate. Secure both screws tightly but be careful not to strip either.
- Slide the plastic bobbin plate back in place. Then screw in its two screws.
- Pop a full bobbin back in and snap the cover back into place.
- Tighten the needle back into place (bonus points for replacing your needle).
STEP 7: TEST IT OUT!
Grab a scrap piece of fabric just to be sure everything is in working order and that you’ve put everything back correctly. You shouldn’t have to reset your thread tension or anything. You just saved yourself an average of $60 per machine cleaning just for reading this!